Insideout.com.au; the home of renovation, expert advice, home interior styling and all the inspiration and tools you need to dream it, design it, do it.
Source: How To Organise Under The Sink With Peter Walsh
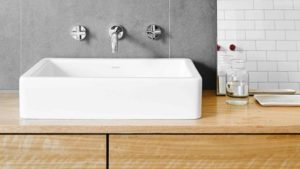 Discover what’s lurking underneath and reclaim this dark abyss by transforming it into an organised cleaning hub
Remember those long nights as a kid when you were terrified of monsters hiding under your bed? The adult equivalent is that dark place under the bathroom, kitchen or laundry sink. Chances are you have no idea what’s hiding there and are in no rush to uncover it or to venture into the abyss… until today.
Does this sound like you? You’re in the cleaning supplies aisle at the supermarket. It’s been ages since you’ve given the shower a good clean. You momentarily freak out that you don’t have enough cleaning supplies… oh look, they’re running a special on ‘Bright & Sparkly Shower Stuff’ and you think, just to be on the safe side, you’ll grab an extra fourlitres of that. Better get a sponge and brush, too. You get home, put the groceries away and chuck the Bright & Sparkly under the sink. Or at least that’s your intention. As you try to cram in that bottle, you realise that you already have three more bottles of the same thing (two unopened). Worse still, the cupboard rebels and refuses to close. Enough of the drama! If you’re having an issue with getting these areas under control, I’m here to help.
1/ Open the floodgates: If you’re a regular reader of this column, you may know what my step 1 is going to be – grab a few boxes or bins and garbage bags and dive in. You want to pull every single item out from under that sink and onto your floor.
2/ Tackle the big clean-up: Throw away anything that’s rubbish. Some of that will be obvious – anything that’s crusty, dirty, dried up or rusty should go. Anything that’s past its use-by date should go. And, then if you still have way too much stuff, anything that has just a drop or two left, you may want to either think about using it that moment or just throwing it (responsibly) away now. The goal here is to get everything into a manageable amount of space. Finally, give that cleaned out area a really good clean (oh yeah, use up anything that you can from your cleaning supply).
3/ Choose what to keep: Arrange like products and items together and take stock of what you currently own. Decide what’s a reasonable amount to keep and how much you’re likely to use in the near future.
4/ Create cleaning kits for each room: Buy some caddies that have handles – I love these guys. They make it easy to store items under a sink and they’re great for when you go to clean a room. Just grab that caddy and take it with you to wherever you’re going to clean or deal with a spill. Designate a caddy for each room you clean regularly; for instance, you don’t need the furniture polish in the caddy that you use to clean a bathroom.
5/ Fit it all in with ease: Put the items in their caddies back under the sink. If you find that you need even more room and you have a particularly tall cabinet, one of the tricks I use a lot is a towel tension rod. These are great for hanging horizontally under the sink and storing spray bottles on. Then it’s just a matter of stepping back and marvelling at how you’ve conquered one more clutter monster in your home!
IF YOU ONLY HAVE 10 MINUTES!
Reach as far back as you can under the sink (if you dare!) and see what you pull out. You’llbe amazed at what you find. You might be disgusted, too… Regardless, decide whether what you’ve grabbed is something you need or can get rid of. If it’s a keeper, use some of it straightaway. With any luck, you might use it all and you’ll have one bonus part of your house that’s a little more sparkly!
Go to peterwalshdesign.com to learn more about Peter’s books, videos and TV appearances.